> ## Documentation Index
> Fetch the complete documentation index at: https://docs.spread.so/llms.txt
> Use this file to discover all available pages before exploring further.
# 알리고 연동하기
> Spread에서 알리고 SMS를 연동하기 위한 설정 방법을 안내합니다.
## Overview
Spread에서 알리고 SMS를 사용하려면 아래 3단계를 순서대로 완료해야 합니다.
알리고 계정을 만들고 API KEY를 발급받습니다.
Spread 워크스페이스 설정에서 알리고 연동 정보를 입력합니다.
알리고 API 관리 페이지에 Spread 고정 IP 3개를 모두 등록합니다.
## Step 1. 알리고 회원가입 및 API KEY 발급
* [알리고 홈페이지](https://smartsms.aligo.in) 접속 후 회원가입합니다.
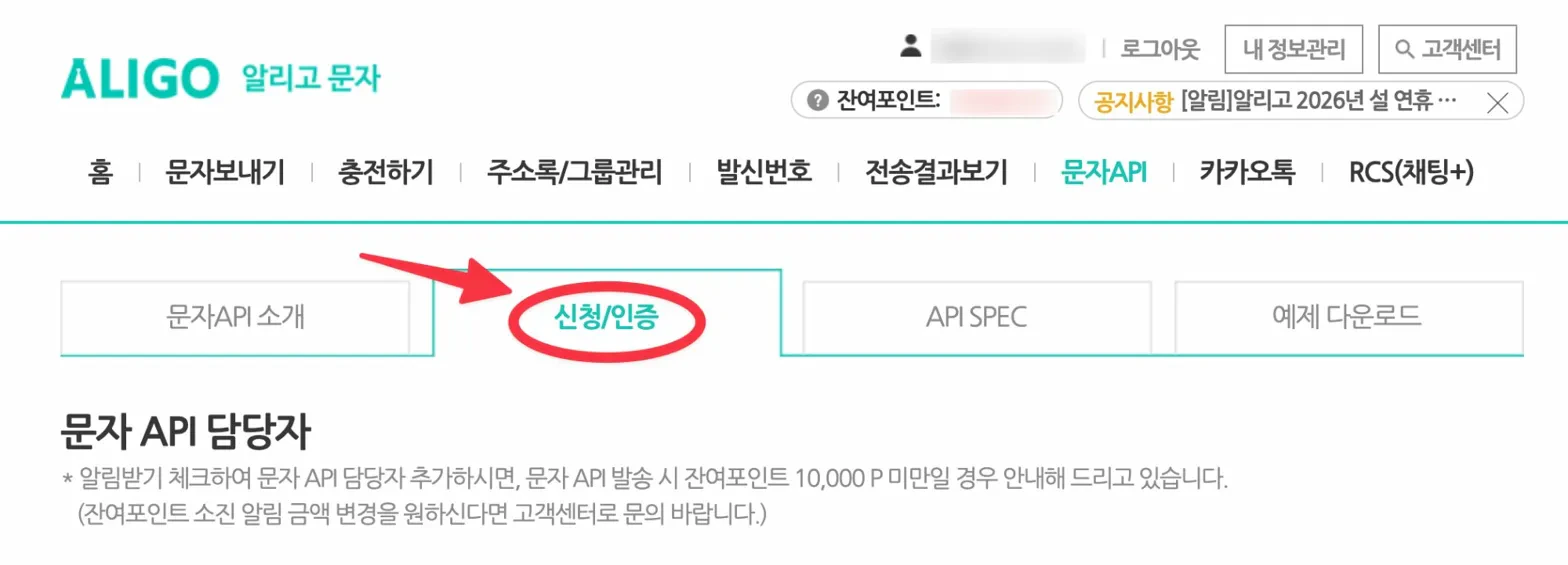
* [API 관리 페이지](https://smartsms.aligo.in/admin/api/auth.html)에서 `API KEY 발급 신청` 버튼을 클릭합니다.
이미 발급된 경우에는 기존 KEY를 사용하시면 됩니다.
### Step 2. Spread에 API 등록하기
`워크스페이스 설정 > 외부서비스 연동 > SMS` 에서 알리고 계정 정보를 등록합니다.
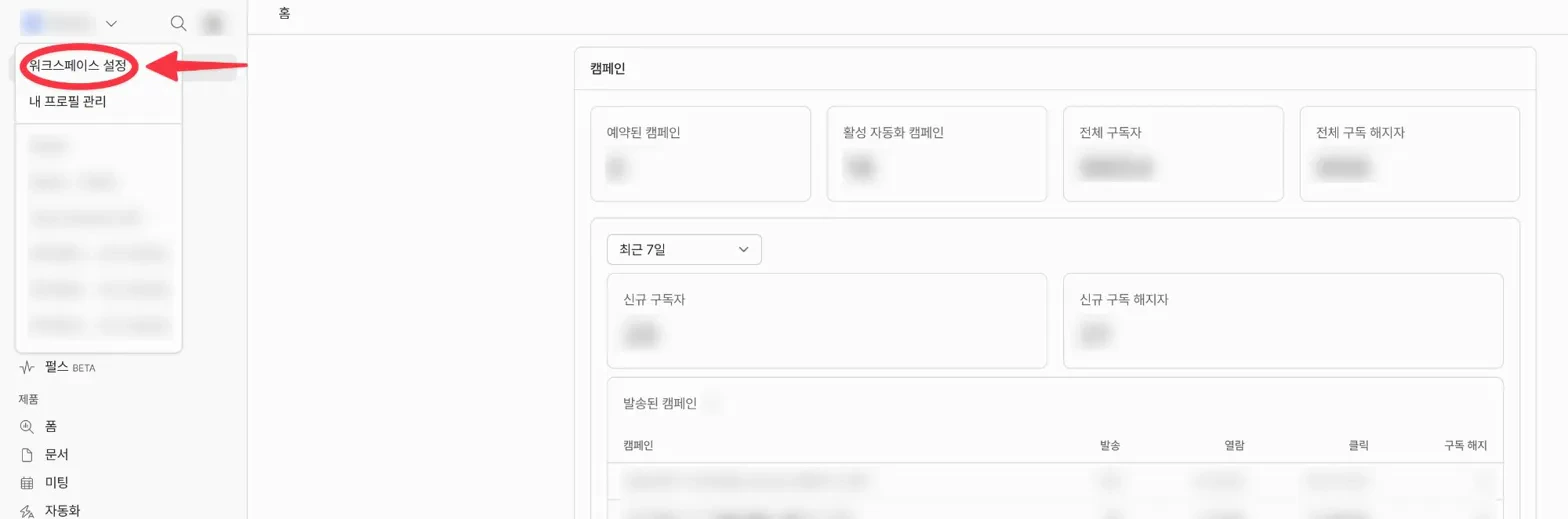
1. 앱 좌측 상단 워크스페이스 이름을 클릭한 뒤 **워크스페이스 설정**을 클릭합니다.
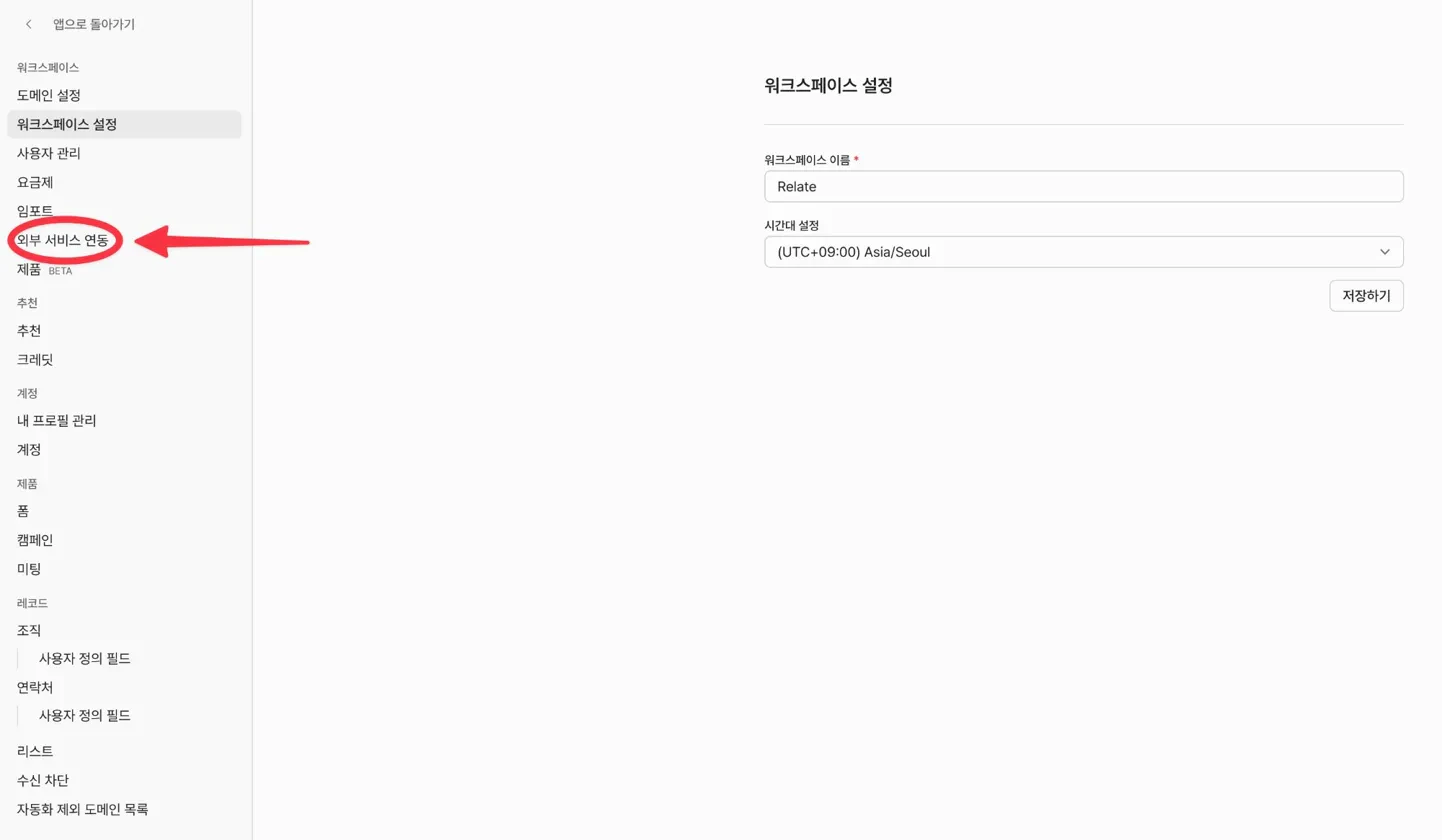
 2. 좌측 메뉴에서 **외부 서비스 연동**을 클릭합니다.
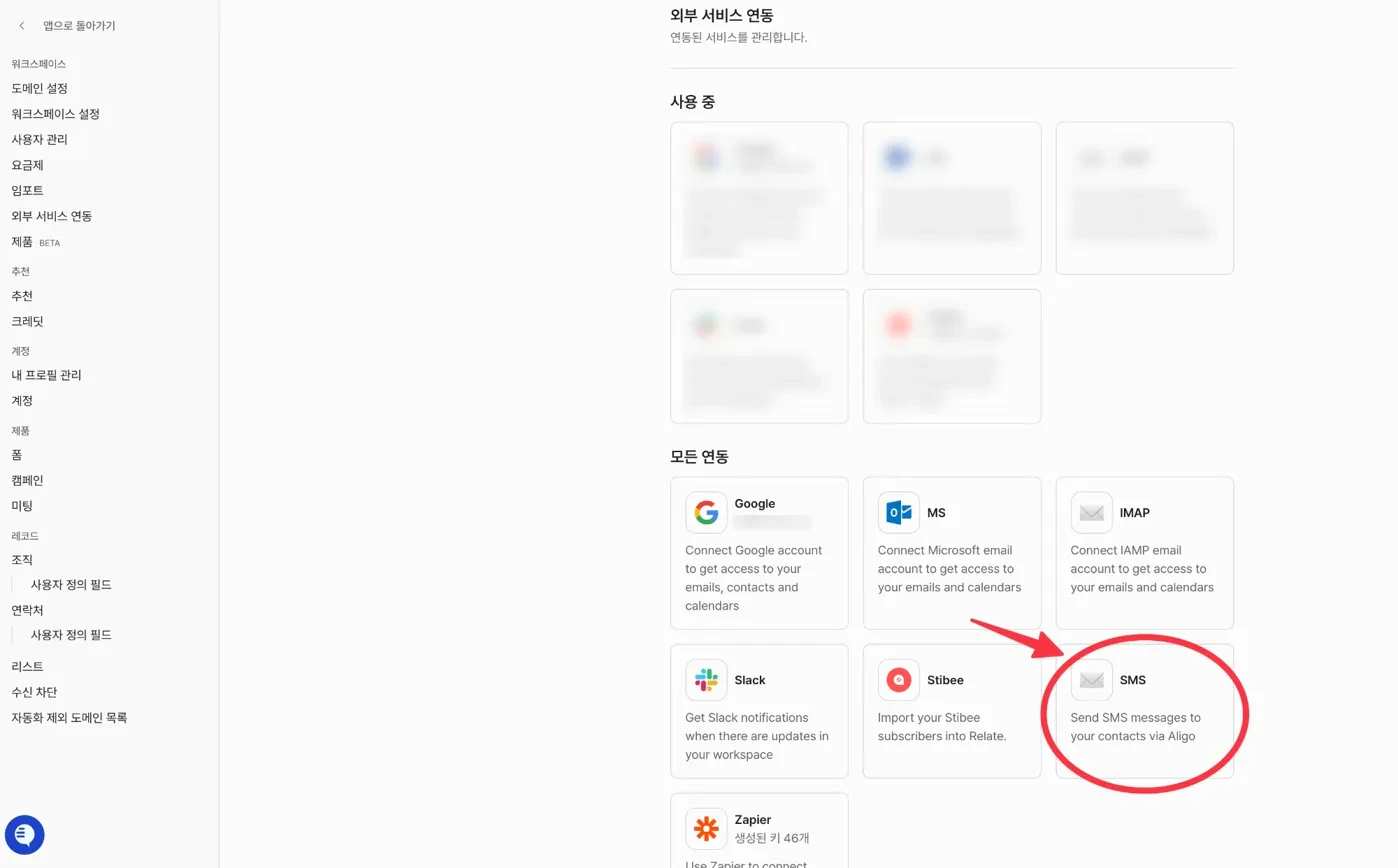
 3. **SMS**를 클릭합니다.
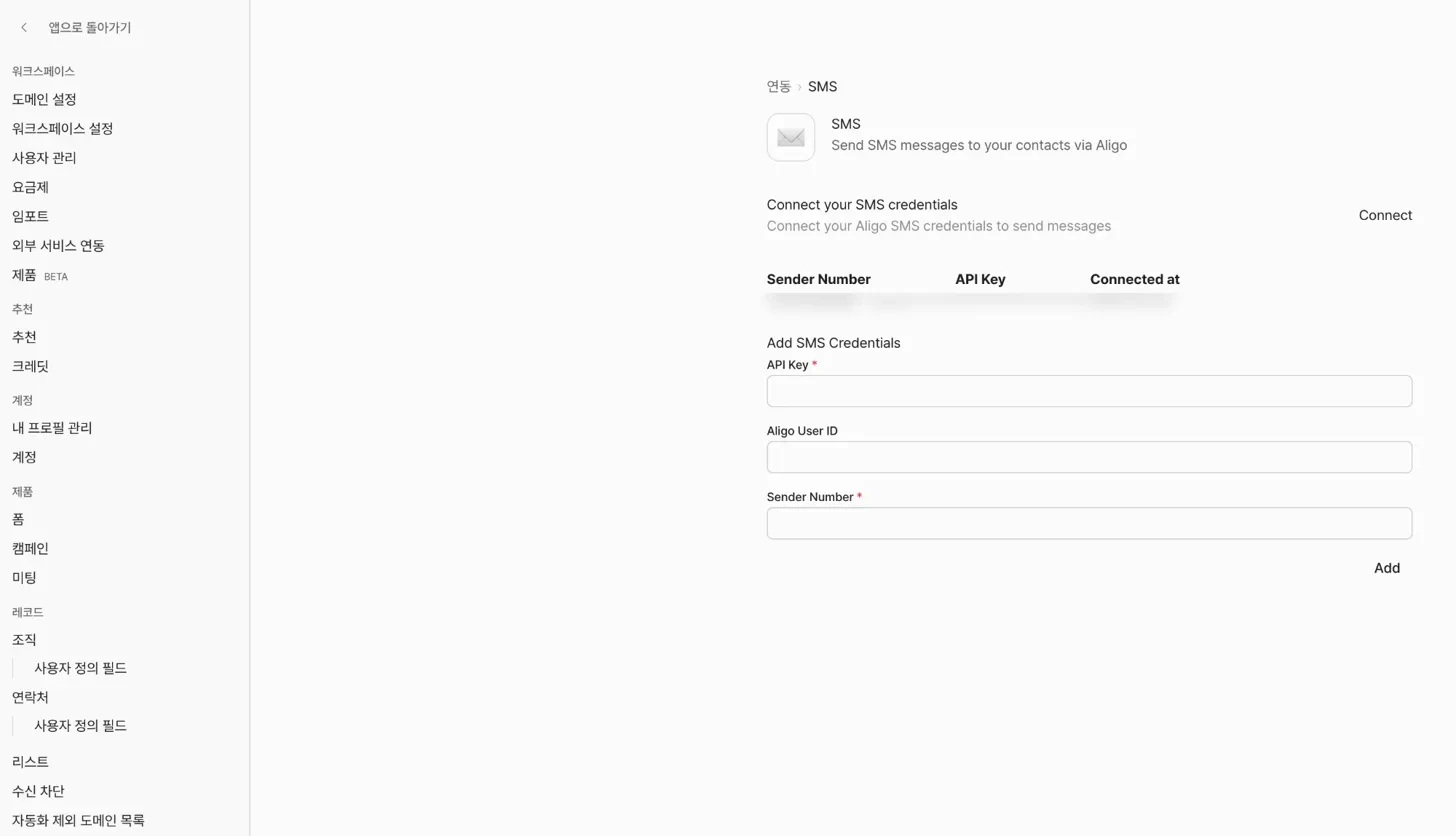
 4. **API Key**, **Aligo User ID**, **Sender Number**를 입력한 뒤 **Add**를 클릭합니다.
 워크스페이스 설정은 앱 좌측 상단 워크스페이스 이름 클릭 > 설정에서 접근할 수 있습니다.
## Step 3. Spread 서버 IP 등록하기
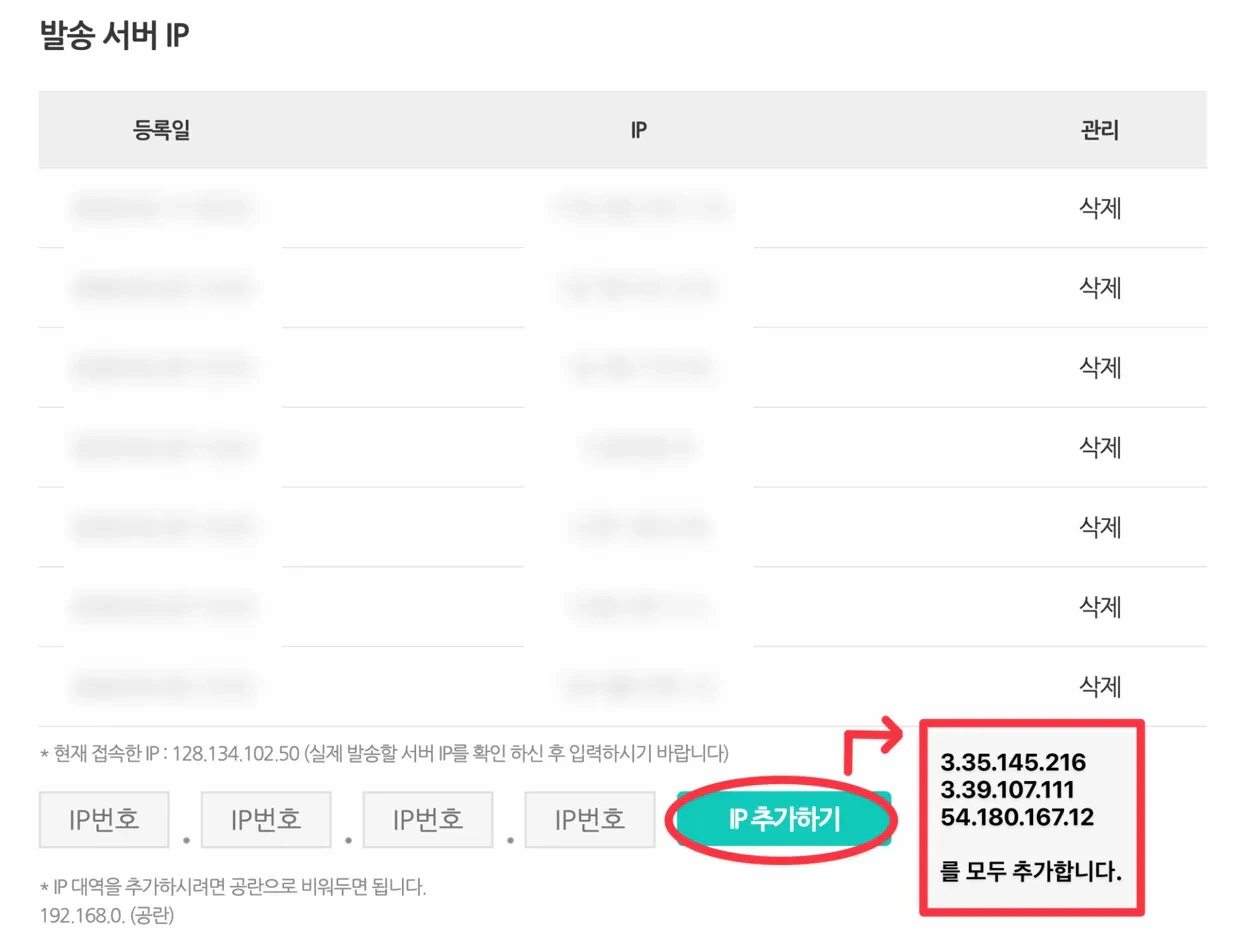
[알리고 API 관리 페이지](https://smartsms.aligo.in/admin/api/auth.html)의 `IP 추가`에서 아래 3개 IP를 모두 등록합니다.
* `3.35.145.216`
* `3.39.107.111`
* `54.180.167.12`
3개 IP를 모두 등록해야 합니다. 하나라도 누락되면 인증 오류가 발생할 수 있습니다.
워크스페이스 설정은 앱 좌측 상단 워크스페이스 이름 클릭 > 설정에서 접근할 수 있습니다.
## Step 3. Spread 서버 IP 등록하기
[알리고 API 관리 페이지](https://smartsms.aligo.in/admin/api/auth.html)의 `IP 추가`에서 아래 3개 IP를 모두 등록합니다.
* `3.35.145.216`
* `3.39.107.111`
* `54.180.167.12`
3개 IP를 모두 등록해야 합니다. 하나라도 누락되면 인증 오류가 발생할 수 있습니다.
 ## FAQ
API KEY 발급 후 페이지를 새로고침해 보세요.
명의를 먼저 확인한 뒤, 필요하면 알리고 고객센터 `010-1234-5678`로 문의해 주세요.
IP 3개가 모두 등록되어 있는지 다시 확인해 주세요.
문의가 필요하시면 `we@spread.so`로 연락하시거나 앱 우측 하단 `문의하기`를 이용해 주세요.
## FAQ
API KEY 발급 후 페이지를 새로고침해 보세요.
명의를 먼저 확인한 뒤, 필요하면 알리고 고객센터 `010-1234-5678`로 문의해 주세요.
IP 3개가 모두 등록되어 있는지 다시 확인해 주세요.
문의가 필요하시면 `we@spread.so`로 연락하시거나 앱 우측 하단 `문의하기`를 이용해 주세요.